By Bill Campbell
Whenever teaching traditional long gun stances, most firearms instructors stress four points of contact in the grip while presenting a long gun such as a rifle, shotgun or sub-gun. The traditional four points are: Primary hand at the grip, Support hand on the fore-end, Butt-stock in the toe of the primary shoulder and a consistent cheek-weld on the comb of the stock. With a traditional four point grip, the operator has good control of the long gun and the sight picture is placed directly in front of the dominant eye. This grip allows the operator to see directly through the sights when firing, and the vertical attitude of the gun allows quick movement from “ready” to the eye and back to “ready” for scanning and manipulation. But what happens when the operator dons equipment which keeps him from being able to use his traditional training? What happens when the equipment interferes with the ability to hold the gun on a vertical attitude and a cheek weld cannot be achieved? This is exactly the problem that…
an operator faces when he dons an SCBA (Self Contained Breathing Apparatus) or many of the gas masks required for tactical law enforcement use.
In the past, only a small group of selected law enforcement personnel, such as HAZ-MAT teams, were required to wear equipment like SCBA. However, in today’s ever-changing tactical environment with the real threat of biological or chemical attacks, personal protective equipment (PPE) such as SCBA is becoming more of the standard issued equipment for the modern tactical officer. Additionally, gas masks are now issued to almost every front line cop in the country. In reality, every officer in America may sometime have to use a long gun while wearing a gas mask or SCBA.
During a recent tactical SCBA course I attended with my SWAT unit, I was basically trained in SCBA by the knowledgeable officers of the Phoenix Police S.A.U.. During the range training blocks, it quickly became evident that difficulties exist in attempting to aim a shoulder-fired weapon when a large gas mask canister or an SCBA regulator prevent the normal weapon presentation. Here are some basic techniques we discussed in the training for long gun use while wearing SCBA or a gas mask.
Stance Directed Fire (Unsighted Fire)
If one thinks about it, during the traditional aiming process, the body aims a firearm through stance and grip and the eye uses the sights to check and make small corrections to aim. At greater ranges, the margin of error in aiming during the initial bodily presentation is greater and therefore the “quality assurance” provided by the eye is more important (we need to use the sights to effectively hit the target at longer ranges). However, at closer ranges to target, the need for the eye’s “quality assurance” is not necessarily required because there is a much greater margin for error. In other words, when up close and personal, the sights may not be needed as the stance and grip alone are able to aim effectively enough to achieve the desired hits. This principle is called Stance Directed Fire since the stance is primarily responsible for the aiming. I hesitate to call it “point shooting” because this term has become almost a trademark for Rex Applegate techniques of shooting, which have made a resurgence through key firearms instructors in recent years. However, the generic words point shooting might be an appropriate description for these techniques.
In each of these techniques, the operator directs the aim of the firearm through the stance and grip he applies without using the sights of the gun. In each technique, the long-gun is snapped to the firing position and the operator points the barrel into the target using body alignment and muscle memory. The usefulness of the technique is dependent on the ability of the operator and the proximity to the target. As range increases, the less reliable the technique will become.
1. Shoulder Presentation: In this technique, the operator squares up the hips, knees and shoulders with the target and snaps the gun straight up from the ready without dropping the face onto the stock. The eyes focus directly onto the target and through “natural point-of-aim,” the shooter triangulates the aim of the muzzle toward the target.
2. Sternum Presentation: Similar to the shoulder presentation, this technique differs in that the butt-stock is placed against the sternum in the center of the chest directly under the chin of the operator (well below canisters or regulators). The centered position assists natural bodily alignment of the weapon as well as controlling recoil in automatic weapons.
3. Belt Line Presentation: When in a rear guard position or while partially incapacitated, the operator may only be able to defend himself with one hand. If the weapon hangs from a traditional three-point or other tactical sling, the operator can drop the butt-stock and place it against his abdomen at the belt line, allowing the sling to hold the firearm in place. This technique works similarly to the sternum position except that the firearm can be controlled using only one hand with reasonable close-range accuracy, even in full-automatic modes.
4. Sling Extension Presentation: I first saw this technique used in an H&K MP-5 operator’s course several years ago. In this technique, the three-point sling is tightened slightly. During presentation, the operator extends the firearm away to near arms length with the support hand, pulling the weapon tight against the sling. The tension of the sling against the arms and the sub-gun itself, causes a natural alignment which is very controllable in full auto modes. The aim can be easily adjusted by simply changing the angle of the support arm extension, as the foreword grip tends to align naturally with wherever the eye directs.
When teaching or using these techniques, it should be noted that this is not “un-aimed fire” but rather it is “unsighted fire.” The gun is being aimed at the target by the body without the “quality assurance” of the sights.
Horizontal Mount or Chicken Wing Technique (modified grip to allow sighted fire)
When engaging at ranges where stance directed fire won’t guarantee hits, the operator will have to use the sights of the long gun, but with the canister or regulator near the normal cheek position, the operator will have to find a different way to get his eyes behind the rear sight. The horizontal mount has the operator place the butt against the bicep at the lower edge of the primary shoulder. When firing, the user cocks the head slightly toward the primary side while rotating the primary arm upward to a high horizontal position, similar to a chicken wing. This brings the long gun upward into a horizontal position alongside of the head, above the canister or regulator on the SCBA. If the firearm has raised sights such as an M-16/M-4 or a raised aiming device (such as a EOTech Holo-sight), the shooter may be able to readily see through the normal sight picture, although it will be canted 90 degrees.
In practicing this technique, I have found that I am able to hit accurately well into the mid-ranges (25-75 yards) without difficulty. It should be recognized that when canting a long gun this way, there is a completely different trajectory from the normal vertical attitude and therefore zero will change significantly as range increases. I’d also like to note that the use of this technique with a shotgun will be increasingly punishing to the shooter since all recoil is absorbed by the bicep.
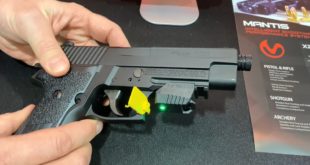
Laser Aiming Devices and Weapon Mounted Lights
Another alternate solution to aiming without a good cheek-weld could be as simple as adding a laser aiming device or white light to the long gun. The technology of lasers has improved significantly over the past few years. Companies like Laser-Max have become sensitive to the needs of law enforcement and have developed quality laser aiming devices which are brighter, more durable and hold zero much better than just a decade ago. Over the past year, I have tested the use of the Laser-Max LMS-1202 which is an integrated laser and illumination accessory specifically designed for the Remington 870 shotgun. After extensive testing with multiple police loads, I have found it to be an exceptionally durable and accurate piece of equipment.
Through the use of lasers on shotguns, rifles or sub-guns the operator has the ability to use multiple nontraditional stances and grips, while still having the ability to ensure accurate hits in a tactical environment. In the case of the use of the shotgun where the chicken wing technique will be punishing, a laser may be a simple way to avert an injury while ensuring accuracy.
In my opinion, laser’s and weapon-mounted lights are especially beneficial with SCBA’s. In an environment where the extra weight and confines of the SCBA can cause a claustrophobic effect, the laser and light focuses the operator’s attention outward toward potential targets, and assists in target identification and aiming of the firearm. Operators and instructors need to be mindful of the limitations of lasers in bright sunlight and aware of trajectory differences from the laser point at greater ranges.
Some may scoff at this idea due to the additional cost of adding a laser to the firearm. However, it should be noted that the SCBA’s themselves cost several thousands of dollars, so the addition of a few more dollars to purchase a laser to be able to effectively operate and defend oneself, seems like a small matter. After all, breathing clean air is probably not your greatest concern if you find yourself in a gunfight.
I will be the first to admit that for years I never recognized the need for anything other than traditional long gun stances, but my exposure to the SCBA has opened my eyes to the need for alternate solutions. I hope this article is useful to other officers who may find themselves trying to balance the need for breathing clean air and winning a gunfight. I’d like to extend a special thanks to the Phoenix Police Department SAU for their excellent instruction in the tactical use of the SCBA. The majority of the content in this article is due to their sharing of good police training.
About the Author:
Bill Campbell is a veteran tactical officer and firearms instructor with the Gilbert, Arizona Police Department and is recognized as a SME instructor in firearms training for AZ POST. Bill also teaches nationally as an Adjunct Staff Instructor for the NRA Law Enforcement Activities Division, teaching instructor schools in all LE firearms disciplines. Bill is a member of the NRA, NTOA, IALEFI and serves on the National Advisory Board of The Police Marksman magazine.
This article was originally published in The Police Marksman magazine.
Click here to subscribe to The Police Marksman magazine.
Click here to order The Police Marksman back issues.